Author Resources
Welcome to new authors registered to the site! Here are some resources to help you with creating or editing content on the AxaMonitor wiki.

Creating Content
Start wherever you think you have the most to offer! Don’t worry about getting all the wiki-authoring code perfect; that’s what other editors will help with while you’re learning. The important thing is getting content on the site.
Orphans and Stubs
{!Orphans:Pages that need to be “adopted”}} and {!stubs:Incomplete pages that need more work}} are articles ready for you to create or edit. Here’s where you can easily find the list of orphan and stub pages on this site; it’s updated in real time.
You’ll learn quickly that the best way to make note of articles that need to be written later is to create a link around the term — you do that by placing double brackets around a word (or words), like this:
I want to write an article about [[tiddly winks]] but first I need to edit the [[lawsuit]] page.
Which turns out like this:
I want to write an article about tiddly winks but first I need to edit the lawsuit page.
See how tiddly winks has a dotted link underneath, while lawsuit has a solid link? Tiddly winks is a type of orphan known as a wanted page, alluded to but not yet created. Wanna check? Here’s an up-to-date list of the "wanted" pages on the site. Tiddly winks is on it :) Meanwhile, lawsuit is an existing, substantially complete page.
Creating New Pages from Orphans
You’ll find {!wanted links:Orphan links to pages that don’t exist yet}} links throughout the site. If one of them strikes your fancy, click on it. You can use the New Page tool button to (the + sign) to create the page with that name.
P.S. Don’t create a tiddly winks page or this page will have to be re-edited!
New Topic?
Want to cover a new topic? Use the search bar to see if the topic already exists. If the search turns up nothing, you’ll get a message saying so but allowing you to create a new page with the title of your search term. The first page tool button at the top of the floating navigation bar changes to a + sign. Click that and your new page is created for you to start.
Starting from Scratch
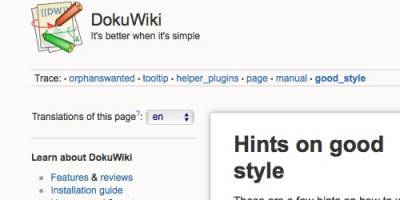
DokuWiki has a helpful page, Hints on Good Style, that helps you organize and lay out your new article. Give it a read!
Editing
Whether you’re creating a new article or editing an existing one, you’ll see the same text-editing window. It’s a WYSIWYG editor so the buttons that appear across the top are the tools you’ll most likely use. The admin or another author will clean up any formatting issues, so don’t worry too much about being perfect your first try. Here are some tips to help you out, though:
- Wiki syntax — We have a built-in manual to help you learn how to code on DokuWiki. You can access the manual from any page using the DokuWiki menu in the navigation bar; Syntax is a submenu under DokuWiki. You’ll pick it up quickly; it’s way easier than HTML or CSS.
- Page source — Find a page formatted similarly to how you want to write your article. Use the Show Page/Edit Page button to see how the previous author coded the page.
Style Guide
Familiarize yourself with the How to Use this Site article to learn about some of the article layout and visual cues we use to aid readers in navigating the material. DokuWiki’s Good Style article has lots of great tips, too.
Tagging
In order to help readers find related articles, please add {!tags:Also known as keywords, categories, topics or subjects}} to the bottom of each article. Try not to do too many. Here’s a list of the tags created so far.
- Write the tags at the bottom of your article, separated by spaces. If your proposed tag is more than one word, put an underscore between them, like_this.
- Highlight the tag words.
- Click on the Tag button
 in the WYSIWYG editor’s ribbon along the top of the text window. That will automatically add the tag syntax around the words you highlighted.
 - Now anyone can click on the tagged words at the bottom of any article and explore all the other articles related to that topic listed in reverse chronological order.
Versions
Each time you edit a page you create a new version. You can see earlier versions in each page’s edit history using the Old Revisions page tool button. Each time you save a new version, make sure you explain what and why you changed using the Edit Summary text field below the Save, Preview and Cancel buttons at the bottom of the WYSIWYG editor. If it was just spelling, grammar or somesuch, just click the Minor Changes box instead.
The Preview Button
Make liberal use of the Preview button at the bottom of the WYSIWYG editor to see what your edits look like on the “live” version of the page. Only hit Save when you’re ready to commit to an entire new version, otherwise you create an unnecessarily long edit history. Drafts are autosaved as you edit, so you don’t need to save manually.
Administrative Editing
Administrator Carlos Pedraza may make changes to articles you create or edit for purposes of grammar, accuracy, clarity, format, layout and to align with the site’s stated informational purposes.
Keywords
